


Parsing Images
DSI Studio accepts major image formats, including DICOM and NIFTI. The followings are steps to convert them to DSI Studio formats.
Convert DICOM Files to SRC Files
To organize DICOM files in DSI Studio, you have two options: [Batch processing][Step B1a: Rename DICOM files] and [Batch processing][Step B1b: Rename DICOM in Subfolders].
For the former option, you need to select all the DICOM files that are ready to be renamed. Once selected, the files will be moved into their respective folders.
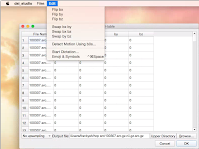
The latter option requires you to assign a root folder that contains all the DICOM files to be sorted. DSI Studio will then rename the DICOM files and place them in different folders based on their pulse sequences. You can refer to the figure on the right for a visual representation of this process.
After organizing the DICOM files, you can generate .sz files (or .src.gz files in older DSI Studio versions) using [Batch processing][Step B2c: DICOM to SRC/NIFTI]. Simply select the root folder that contains all the scan data.
Alternatively, you can convert DICOM to SRC using [Diffusion MRI Analysis][Step T1: Open Source Images] in the main window. Select the folder containing the organized dMRI DICOM files, and DSI Studio will generate a .sz file (or .src.gz in older versions) for each scan.
Convert NIFTI File to SRC Files
The NIFTI files include no b-table information, and you will also need a bval and a bvec file to create an .sz file (or .src.gz in older versions).
If your data are stored in BIDS structure, a quick way to convert all NIFTI files to SRC files is [Batch processing][Step B2a: NIFTI to SRC (BIDS)].
You may also use [Batch processing][Step B2b: NIFTI to SRC (Single Folder)] to batch convert NIFTI files to SRC files.
To convert one subject’s data, click on [Step T1: Open Source Images] in the main window and select the NIFTI file. DSI Studio will try to locate its associated bval and bvec files in the same folder to create the .sz file.
If DSI Studio cannot find bval or bvec file, you may specify them using the top menu [Files][Open bval] and [Files][Open bvec]

DSI Studio also has its own b-table text file format, arranged in bvalue bvecx bvecy bvecz. The first column is the b-value, and the rest is a unit vector of diffusion gradient direction.
3000 -0.994200 -0.000000 -0.107600
3000 -0.985100 -0.130800 0.111300
3000 -0.985100 0.130800 0.111300
3000 -0.963800 -0.245300 -0.104400
3000 0.963800 0.245300 -0.104400
3000 0.994200 -0.000000 -0.107600
3000 0.985100 -0.130800 0.111300
3000 0.985100 0.130800 0.111300
3000 0.963800 -0.245300 -0.104400
3000 0.963800 0.245300 -0.104400
The file can be loaded using the top menu [Files][Open b-table]
DSI Studio will also search under the NIFTI file directory for a file named “grad_dev.nii.gz” to include gradient nonlinearity information and also “nodif_brain_mask.nii.gz” as the brain mask.
Convert Bruker 2dseq Files to SRC Files
To read 2dseq file, click [Step T1: Open Source Images] in the main window and select the “2dseq” file for creating the .sz file.
Note that DSI Studio will obtain spatial parameters from other accessory files including “3dproc” and “reco”, which are stored in the same directory as 2dseq. In addition to these two files, the b-table will be obtained from the “method” file, which should be stored in the upper directory. Make sure that these files exist and are in the correct relative directories.
Once the image is loaded, the b-table may need additional flipping (e.g. swap x-y, y-z, or x-z). For example, you may need to swap x-y to get the correct result.
Convert Varian and Agilent FDF Files to SRC Files
Click [Step T1: Open Source Images] in the main window and select all fdf files in the folder. DSI Studio will extract b-table information and DWI from the files and create a .sz file.
Step T1a: Quality Control (Optional)
It is recommended that the SRC files are examined by a quality control procedure to ensure its integrity and quality. The reference for this procedure is documented in Yeh, Fang-Cheng, et al. “Differential tractography as a track-based biomarker for neuronal injury.” NeuroImage 202 (2019): 116131.
To do this, use [Diffusion MRI Analysis][Step T1a: Quality Control] and select the folder that contains SRC files (DSI Studio will search for all SRC files in the subdirectories). DSI Studio will provide a report in the following format, which can be paste in Excel:
-
Check consistency in image dimension, resolution, DWI count, and shell count. Certain scans are likely incomplete, and the total DWI count will be different.
-
Check if there is a
low-quality outlierlabel. DSI Studio will examine ‘neighboring DWI correlation’, which decreases if there is a prominent eddy current artifact, head motion, or any head coil issues that may impact the diffusion signals. -
Diffusion contrast estimates the contrast generated by the diffusion gradient. Higher values suggest better resolving power for fiber orientations.
<1.1 Poor (unlikely to resolve fiber) 1.1~1.3 Fair (okay for resolving single fiber)
1.3 Good (can resolve multiple fibers)
DSI Studio will use an outlier checking function (e.g. 3 median absolute deviations) to label problematic data with ‘low-quality outlier’. The example on the top identifies a dataset with a neighboring DWI correlation of only 0.892282, which is substantially lower than the other. Another dataset 102008 has a different b-table, which cannot be used together with the others. If a dataset has a very low neighboring DWI correlation, you will need to examine the raw DWI images (see video above) to see if the problem is correctable. Otherwise, the problematic datasets should be excluded from the analysis.
Flip b-table (Optional)
DSI Studio allows for flipping the b-table before creating the .sz file. The functions are under the [Edit] menu.
Resample dMRI Signals (Optional)
DSI Studio can up-sample the dMRI signals to achieve a high spatial resolution. Once an .sz file is created (following the steps mentioned above), you may use the following steps to get a new .sz file with interpolated dMRI signals that achieves x2 or x4 upsampling. Note that command-line options may also be available in recent versions for a more streamlined workflow.
- Open the created .sz file in [step 2 reconstruction]
- Export a 4D NIFTI file using [Files][Save 4D NIFTI] and a b-table file using [Files][save b-table] (For Mac and Linux users, the [Files] menu is on the very top of the system menu)
- Open the exported 4D NIFTI file in [Step T1: Open Source Images].
- Load the exported b-table file using [Files][Open b-table]
- In the left bottom corner, select upsample 2 or upsampling 4
- Create a new .sz file that has interpolated dMRI signals (which leads to interpolated ODF)
Aggregating Multiple Scans (Optional)
To merge multiple scans into a single .sz file:
For data acquired in the same image space (i.e., no head rotation or movement between scans): Use the --other_source argument when creating the SRC file from the source images. You can provide multiple NIFTI files or folders of DICOMs.
```bash dsi_studio –action=src –source=scan1.nii.gz –other_source=scan2.nii.gz,scan3.nii.gz –output=combined.sz